Firebase Integration with Chrome Extension
Introduction #
This is a brief overview of integrating Firebase with Chrome Extension. Firebase is a platform designed for building mobile and web applications with real-time features. In my case, I use the Firebase SDK to manage Stripe subscriptions, handle user authentication, and trigger Firebase functions directly from the extension.
So let’s get started, I will walk you through the steps to integrate Firebase with your Chrome Extension.
The steps are as follows:
Step 1: Create a Firebase Project #
The first thing you need to do is to setup a Firebase Project for your extension. You can do this by going to the Firebase Console and clicking on the “Add Project” button. You should select the Web option for the extension. 
Step 2: Add Firebase to your Chrome Extension #
Next, you need to add Firebase to your Chrome Extension. You can do this by running the npm command below:
npm install firebase
This should install the Firebase library into your project.
Step 3: Initialize Firebase in your Chrome Extension #
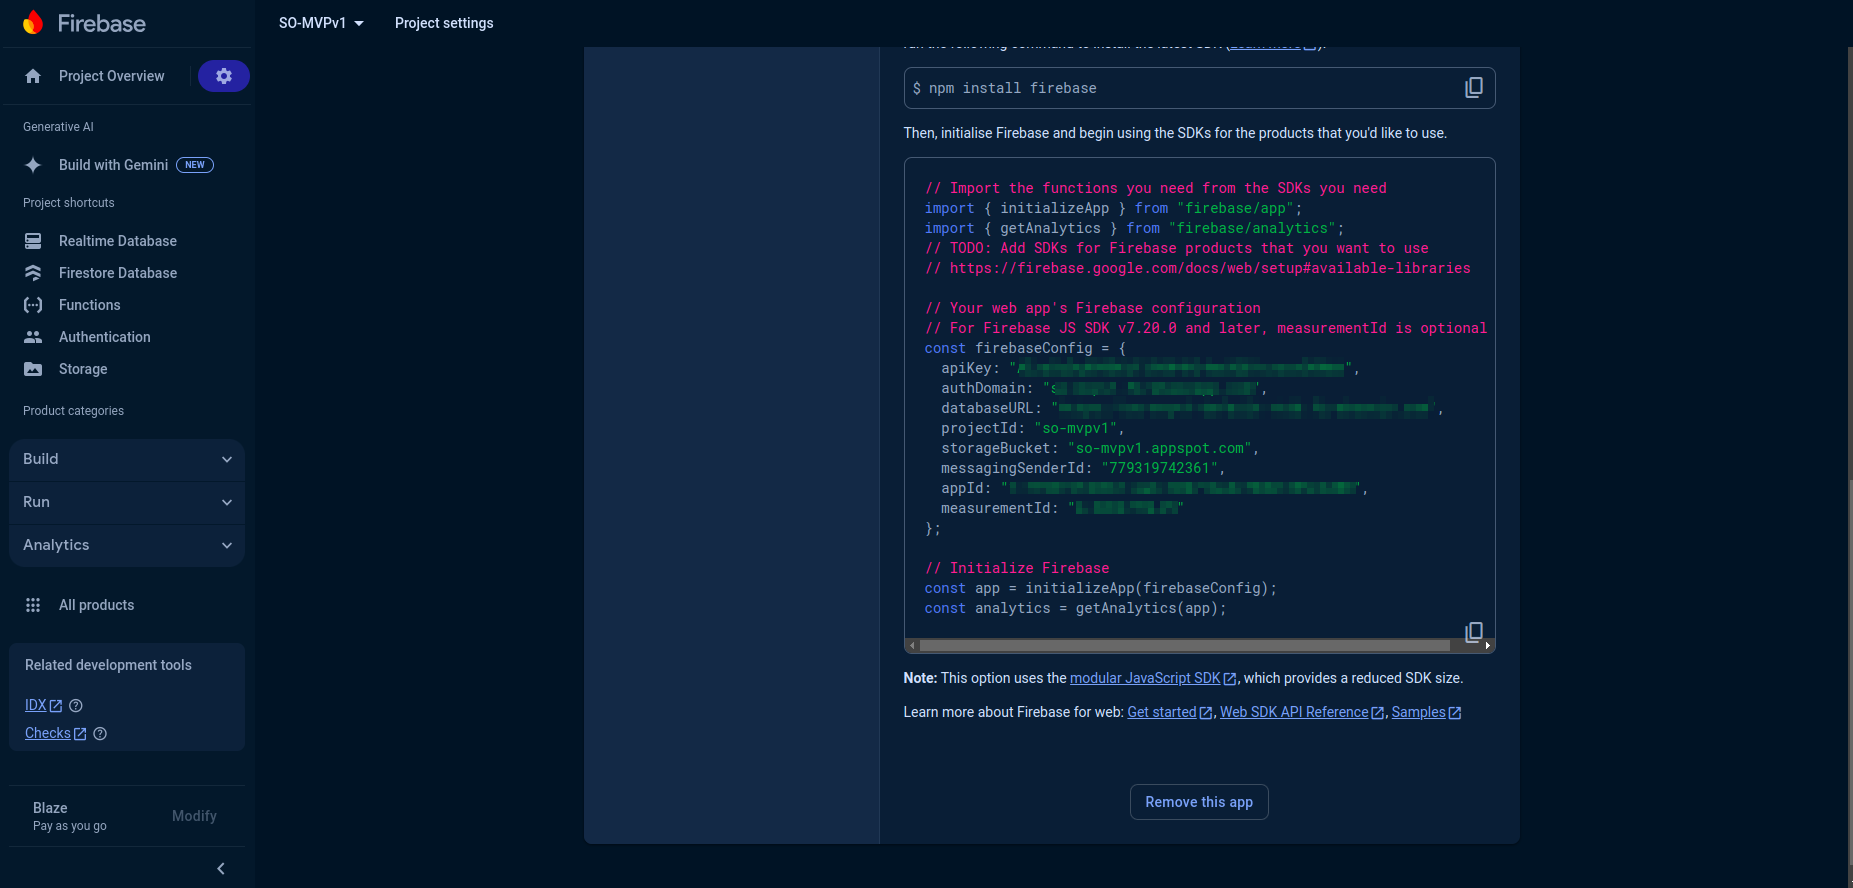
Next, you need to initialize Firebase in your Chrome Extension. You can do this by adding the following code to your background script, content-script, or popup. You can also follow the documentation here.
As of this writing, my Firebase version is 10.11.1, and the code looks like this:
import { initializeApp } from "firebase/app";

// Your web app's Firebase configuration
const firebaseConfig = {
  apiKey: "xxxxxx",
  authDomain: "so-mvpv1.xxxxx.com",
  projectId: "so-xxxx",
  storageBucket: "so-mvpv1.xxxxx.com",
  messagingSenderId: "xxxxxxxxx",
  appId: "xxxxxxxxxxxxxxx",
  measurementId: "xxxxxxxxxxxx",
};

// Initialize Firebase
export const app = initializeApp(firebaseConfig);
Step 4: Enable Firebase Authentication #
You need to enable Firebase Authentication, this is found on the Firebase Console under the Authentication tab. You can enable email/password, Google, Facebook, Twitter, Github, and Phone authentication.
Here is a screenshot of the Firebase Authentication tab: Firebase authentication easily handles user authentication and authorization.

NOTE: You can also add claims to the user object to track the user’s subscription status. This is very useful for building extensions with premium features.
Fore more information about claims, you can check the Firebase documentation. It should be noted that the claims are set on the server-side which means Node.js or Firebase functions.
Step 5: Firebase SDK Documentation and using Firebase Authentication #
Once the authentication are enabled, you can find the documentation for the sign-in methods here.
Here is an example of using the signInWithEmailAndPassword method:
import {
  createUserWithEmailAndPassword,
  getAuth,
  signInWithEmailAndPassword,
} from "firebase/auth";

// Initialize Firebase
const app = initializeApp(firebaseConfig);

// Initialize Firebase Authentication and get a reference to the service
const auth = getAuth(app);

// Sign in with email and password
signInWithEmailAndPassword(auth, email, password)
  .then((userCredential) => {
    // Signed in
    const user = userCredential.user;
    // ...
  })
  .catch((error) => {
    const errorCode = error.code;
    const errorMessage = error.message;
  });
Remote Hosted Code (RHC) #
At this point, you have successfully integrated Firebase/Authentication in your project. However, you need to be aware of the Chrome Web Store’s policy on remote-hosted code. The Chrome Web Store forbids RHC, and the Firebase SDK falls into this category. This is because the Firebase SDK loads some of its code from an external source.
How do you detect remote hosted code? #
As the name implies, remote-hosted codes, are codes that are ‘introduced’ into your extension from an external source. Google frowns at this, because of the implication of injecting malicious code into your extension. All codes must be loaded from the extension. However Firebase SDK loads some of its code from an external source, the easiest way to spot a RHC in Firebase is look for scripts that are dynamically created to load external codes.
The script below is an example of a remote-hosted code in Firebase SDK
// This line of code will cause the Chrome Web store to reject your extension
_setExternalJSProvider({
  loadJS(url) {
    // TODO: consider adding timeout support & cancellation
    return new Promise((resolve, reject) => {
      const el = document.createElement("script");
      el.setAttribute("src", url);
      el.onload = resolve;
      el.onerror = (e) => {
        const error = _createError(
          "internal-error" /* AuthErrorCode.INTERNAL_ERROR */,
        );
        error.customData = e;
        reject(error);
      };
      el.type = "text/javascript";
      el.charset = "UTF-8";
      getScriptParentElement().appendChild(el);
    });
  },
  gapiScript: "https://apis.google.com/js/api.js",
  recaptchaV2Script: "https://www.google.com/recaptcha/api.js",
  recaptchaEnterpriseScript:
    "https://www.google.com/recaptcha/enterprise.js?render=",
});
To fix this, I simply return a resolved promise, as shown below:
// This line of code will cause the Chrome Web store to reject your extension
_setExternalJSProvider({
  loadJS(url) {
    // TODO: consider adding timeout support & cancellation
    return new Promise.resolve(true);
  },
});
Future Consideration #
It’s quite cumbersome to manually edit the Firebase SDK to remove the remote-hosted code. However, you can automate this process by using a tool like Webpack in the build process to remove the code.
The end.